Setting Up Your Helios Account & Connecting Polly
Polly is a connected device. Since Helios and Polly are connected through the internet, you and your learner do not need to be in the same location or on the same Wi-Fi network to monitor their progress. You can access reports, track learner performance, manage content, and much more via the Helios Suite.
The Helios Suite is the web companion to your Polly device, and using it will optimize your learning experience. When you purchase a Polly, access to Helios is included.
Polly does work without the Internet. However, to get the most out of Polly, we recommend you set up a Helios account. If you choose not to set up an account, your progress will not be saved when you shut off your Polly. Then, when you start Polly again, you will not be prompted to begin where you left off in your last session.
Here are the steps for setting up Polly and connecting to the Helios Suite:
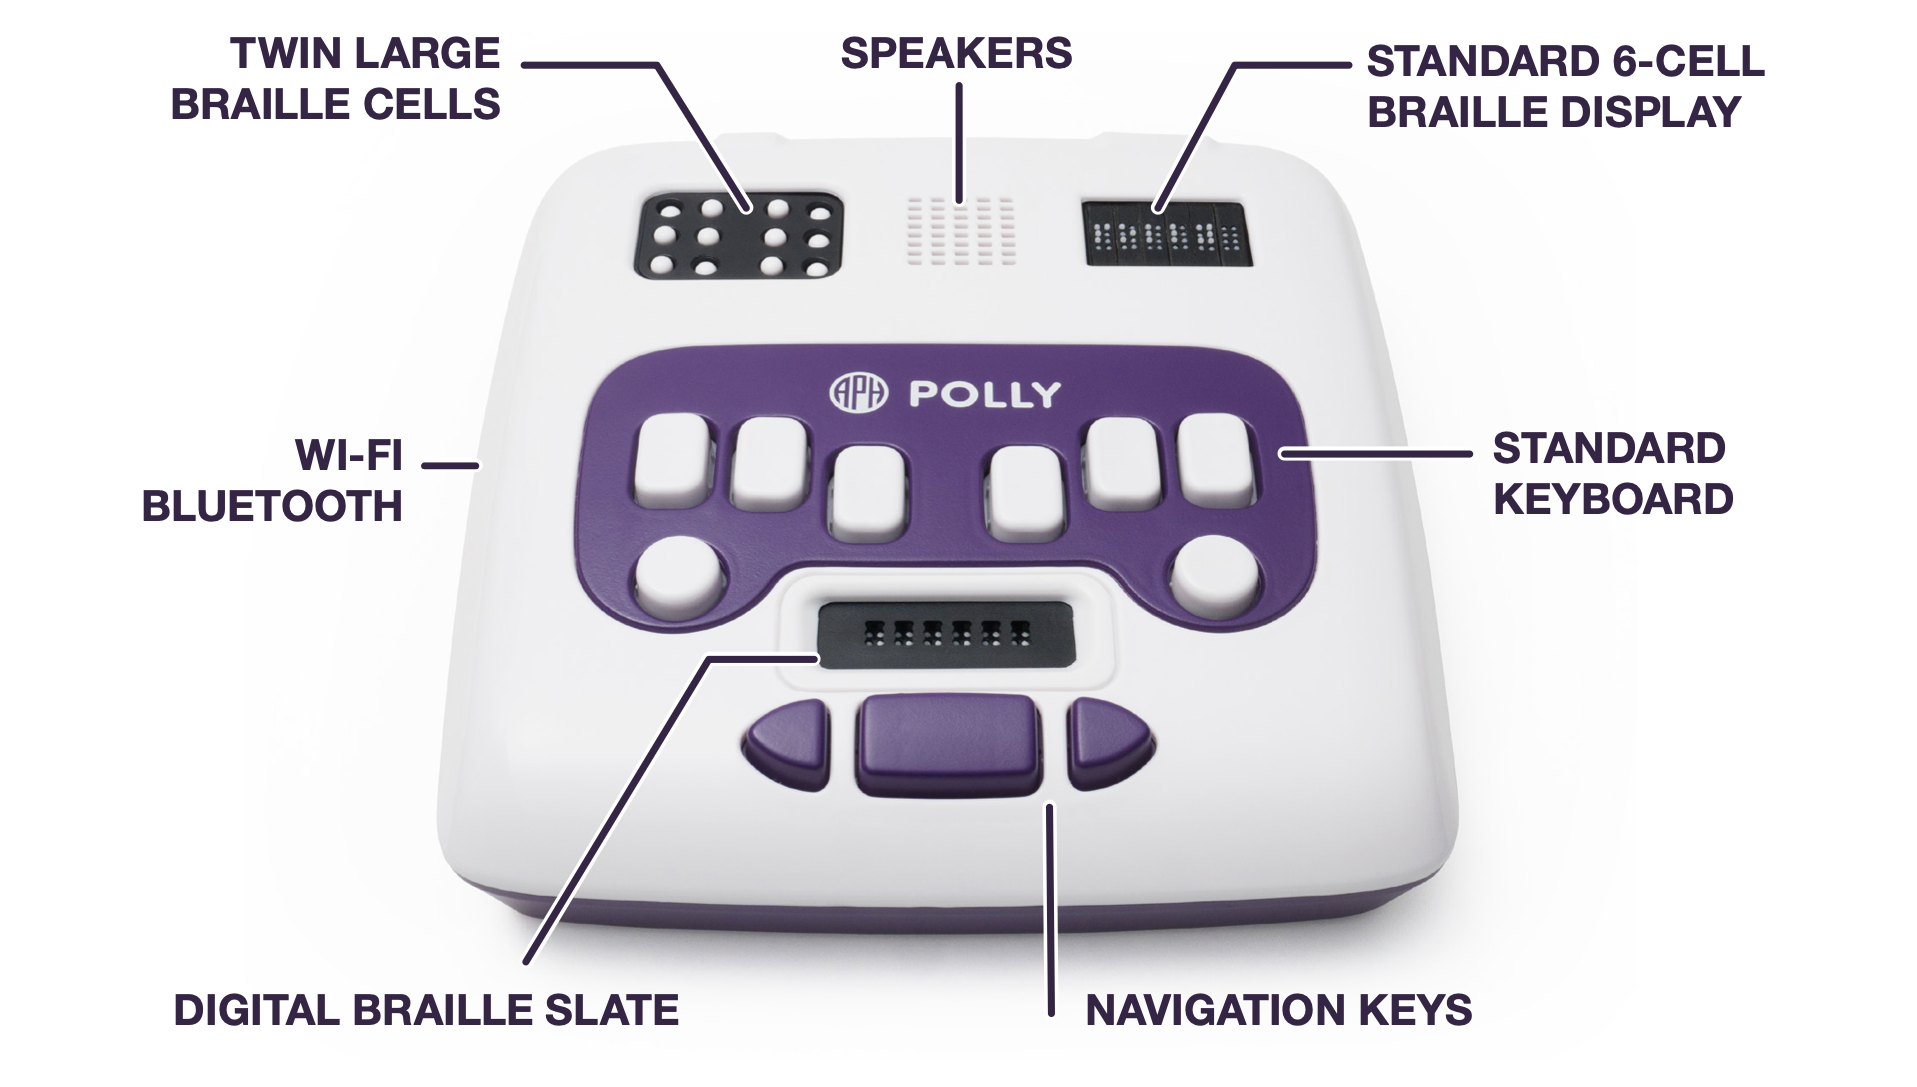
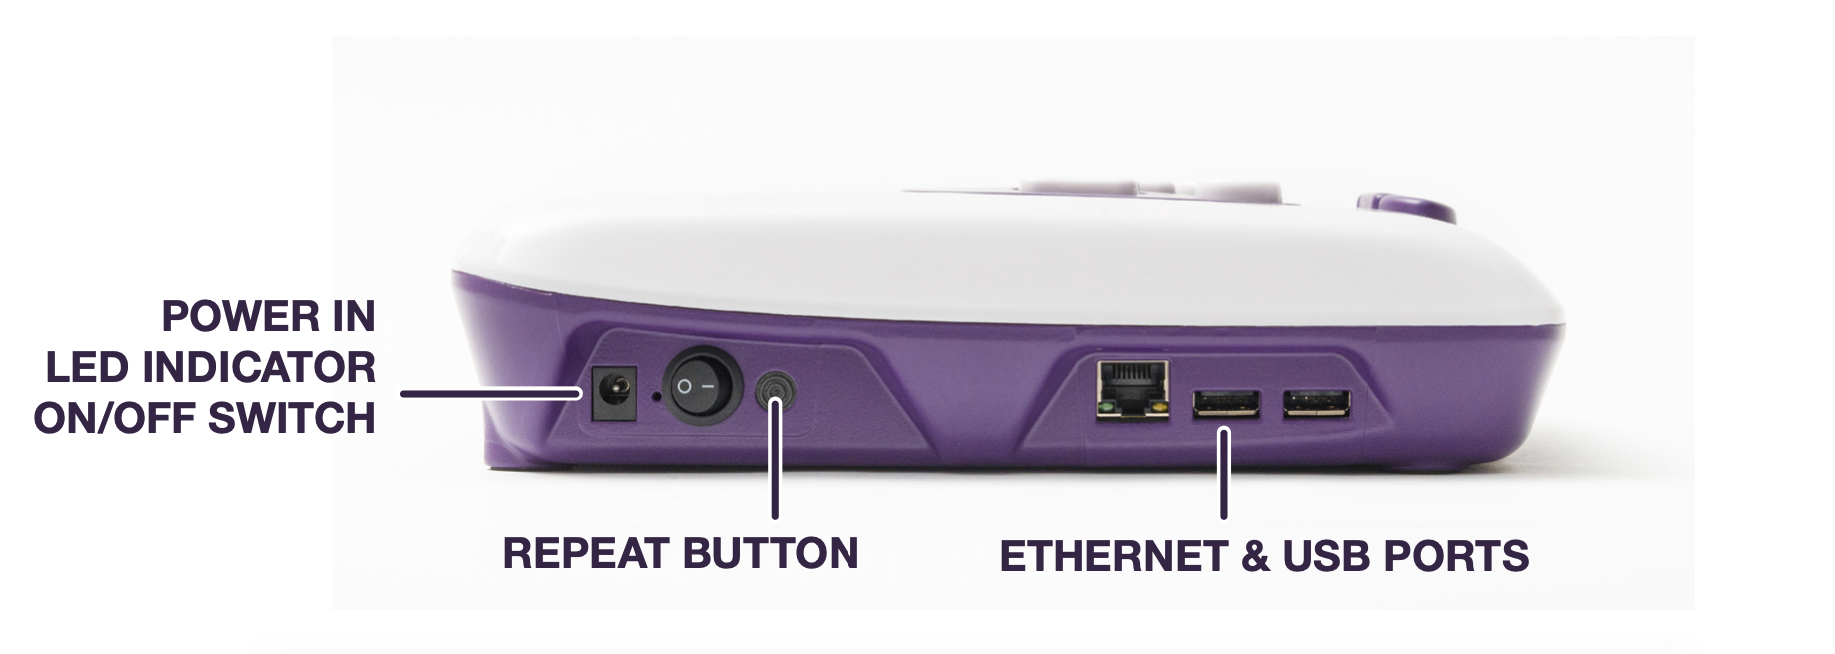
- Locate the sticker on the bottom face of your Polly. This sticker displays the Polly ID and the QR code. You can scan the QR code to find the activation key (more about this later).
- Go to https://polly-helios.thinkerbelllabs.com.
- Enter your email address and select one of two options: Sign in With OTP or Sign in with Link. If you select the first option, Helios will send you an email verification code (a one-time password); if you select the second option, Helios will send you a sign-in link.
- Once you get to the Helios homepage for the first time, you will be prompted to add your Polly device by entering an activation key. Select the + Add Polly button.
- If you haven’t already, scan the QR code to display the activation key. In the Add Polly dialog box, enter the activation key, then click the Verify button. An image of a Polly will appear, along with the words “Verified Successfully!”
- Click the + Add Polly button. A Success dialog box will display.
- Click the Dismiss button, and Helios will take you to a Polly page, where all of your Polly devices will be listed.
Remember the QR code on the bottom face of your device? This code enables you to set up your Helios account on your smartphone. Scan the code, then click the yellow pop-up link to thinkerbelllabs.com, and Helios will display a page with your Polly ID, the activation key, links to the Helios homepage and Quick Start Guide, and a blue Sign-In button. After clicking the Sign-In button, you will follow steps 3-7, above.
You can change the name of your Polly! You might find this helpful if you have more than one Polly and want to assign one device to each learner.
Here’s how:
- 1. Click the Polly ID number.
- In the Polly Details dialog box, click in the Nick Name field.
- Type your desired device name
- Click the Update button.
You’ve successfully connected your Polly to the Helios Suite!